Jacob Help
The documentation about specific features is very rudimentary. If you
have any questions, feel free to send me a message and I will take that
as an occasion to fill some gaps here. For an educational introduction
please see the tutorial (not existent yet). This help is meant as a reference.
It describes the Jacob functionality from a menu and dialog point of view.
Table of Contents
Synopsis
Usage: JACOB [-version] [-help] [-noemacs] [-jedit] [-inifile foo.ini] [your_project.proj]
version: Prints
the version number of the program.
help:
Prints this help message.
noemacs: Use Jacob
without Emacs.
jedit: Use jEdit editor instead of Emacs.
inifile: Starts
this application with another ini file than
the default one.
File Menu
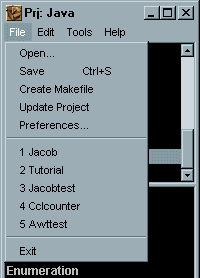
Create Makefile
This creates a makefile for your project. The new makefile is placed in
the same directory as the project file (*.proj). You can take a
look at the makefile with 'Edit->Makefile' which loads it into Emacs. There
are 4 to 5 sections: all, (run), clean, zip,
and cm.
Sometimes to compile a hole project there are some extra things to do
except compiling the java classes. For example executing a precompiler
or a YACC like parser. Therefore you have the possibility to have your
own handwritten makefile that gets executed before Jacob's generated makefile.
If there exists a file make_all_first in the same directory then
this file will be included at the beginning of the main makefile. Then
this file must contain the rule "all_first :".
There are two more special files which are treated similar: make_cm_last
and make_zip_last. If used, they must contain the rules "cm_last
:" and "zip_last". They are invoked through the command make cm
and make zip and executed after the auto-generated "cm :" and "zip
:" rules of the standard makefile. If you need different rules for different
operating systems, use the "OS" variable which has an appropriate values
like "Windows_95" or "Solaris".
Update Project...
You can move a project file to another destination and than update the
internal path for each package and class automatically. This means also,
you can code on one machine, move the code over to a different operating
system, change the classpath to the new environment, and adjust the packages
and classes automatically to the new settings. But you still have to change
the classpath each time manually.
Preferences...
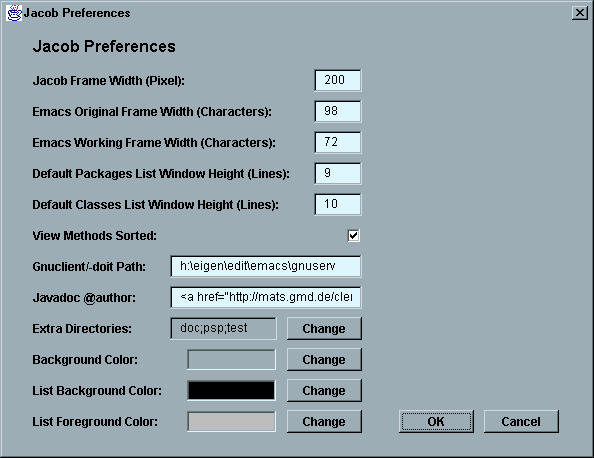
Jacob Frame Width:
Specifies the width of the Jacob frame. There is also an undocumented option
to set the application frame height to a constant value instead of using
the full screen height. Set the field "FrameHeight" by hand in the '.../jacob/jacob.ini'
file in the '[Init]' section. If the "FrameHeight" field is empty, the
full screen size is used.
View Methods Sorted:
If this option is not set, methods in the method list window are ordered
as written in the original source file.
Javadoc @author:
This string is inserted after the @author tag in the documentation header
of a new created class/interface using the Class
Wizard.
Extra Directories:
This field contains additionally sub directories separated by a ';', that
will be created for each new project in the respective project directory.
Leave this field blank if you don't want this functionality. The project
directory is the directory where the '.proj' file resides.
Edit Menu
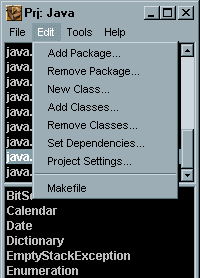
Add Package...
Normally this is the way to insert new source code to your project. Specify
a package name and Jacob will use the classpath to locate this package
and every Java source file which belongs to this directory or its subdirectories.
If a package can't be found you may change the classpath for your project.
To do that go to 'Edit->Project Settings...'.
Then Jacob should be able to find the desired package.
A project must have at least one package. If you simply want to have
classes which don't belong to any package (very common for example for
applets) then make clear the first element of the project's classpath points
directly to the same directory where the project (*.proj) file is
in. Now insert the package named '.' (it consists simply of a dot). This
will insert every Java source file in that directory.
New Class...
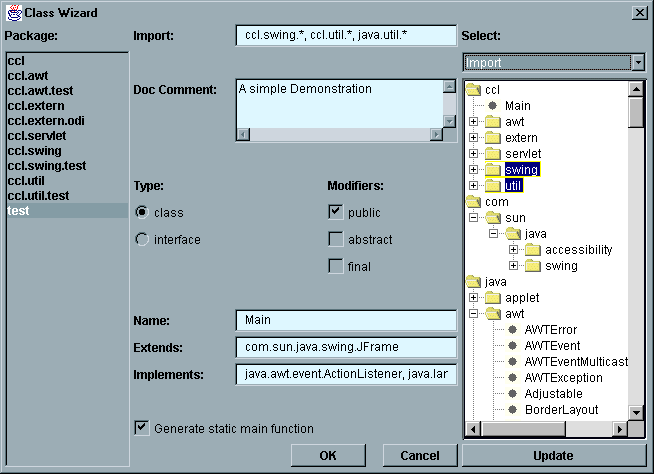
The class wizard creates the initial source file for a new class/interface
and inserts it into the actual project. Entries are separated in the 'import',
'extends', and 'implements' fields with commas. To select more than one
item in the tree, use the mouse together with the control key. Then press
the update button to move the selections into the choosen field. To make
the comma separated
entries in the fields selected in the class tree, just press the appropriate
value in the select box again.
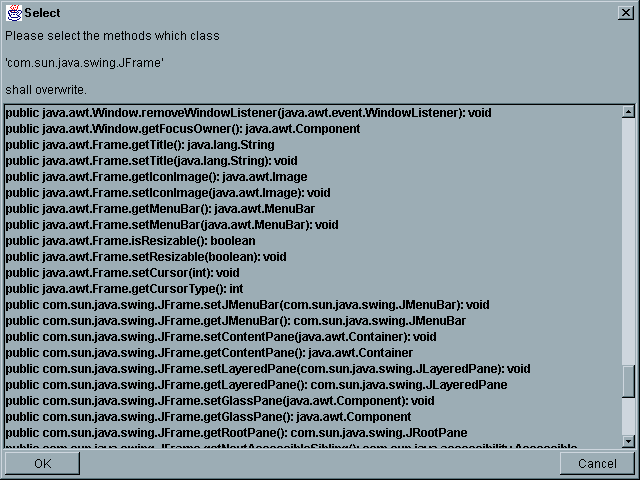
After pressing 'OK' in the former Class dialog, if you extended a class
from another, here is the opportunity to select some methods to overwrite
and to create some empty method bodies. Note, the methods of implemented
interfaces will be created anyway, as well as the constructors of the superclass.
Example output can be seen here.
Method Callees
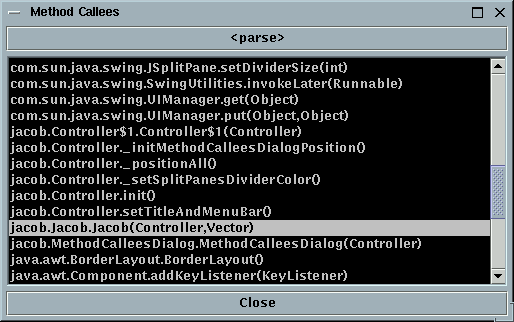 Very fast way to trace through your whole project's source code and to
follow the program's control flow. Start at the main routine and jump from
method invocation to method invocation.
Usage: select a method in the methods window (in this example it was
'jacob.Controller.Controller(String[],String)', then invoke this frame
via menu or better with right mouse button. Hit the '<parse>' button
and each method that is used inside the selected method gets shown. Now
select the one for which you want to see the source code definition. The
editor will show the definition of that method. Additionally this method
gets selected in the browser, so you can again hit the '<parse>' button
to jump iteratively from method to method.
Project Settings...
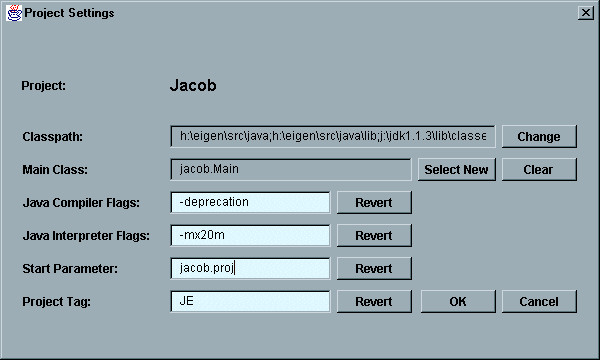
See also 'How can I use environment variables in my project settings?' in the Jacob FAQ.
Classpath:
The default classpath is the classpath Jacob was started with. To allow
Jacob to find new packages and class source files to be included into a
project, for each project a separate classpath can be specified.
Jacob stores for each project different classpaths dependent on the
system architecture hardware, OS, and user home directory. After moving
a project onto a new system the classpath must be once more set. Then Jacob
stores for each environment and project separate paths and chooses the
appropriate the next time.
Start Parameter:
This value is used for the Makefile in the 'run:' section as a parameter
for the application. For example:
...
run : all
$(JAVA) -classpath $(CLASSPATH)
jacob.Main jacob.proj
...
Project Tag:
This string together with the current release number is used as a tag for
the configuration management tool RCS. You must also select a Main Class.
In the source of this class the RCS keyword 'Header' must occur. For each
source file an entry like the following is then created in the 'cm:' section
of the Makefile:
ci -l -nJE43 h:\eigen\src\java\jacob\Main.java
Tools Menu
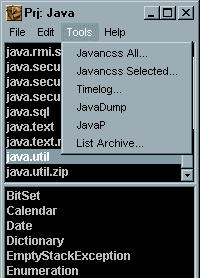 The 'Tools' menu's purpose is to offer a way to invoke other Java applications
out of Jacob. As an example and in the hope someone will find it useful
(and because most of its code is used by Jacob anyway) I included a Lines
of Code counter for Java source code named JavaNCSS. You can take a look
what JavaNCSS (local)
has to offer at its own dedicated page.
If you want to invoke your own or your favorite application out of Jacob,
take a look at the source files in the jacob/tool directory and
use them as examples (or nag me and I will write more documentation or
give you personal assistance [or i will even write it for you/us]). Also
look in the jacob/jacob.ini at the 'Tools' section to get an idea
how to put a new entry in the Tools menu and how to specify which class
will be invoked. Don't forget to start Jacob with an extended classpath
if necessary.
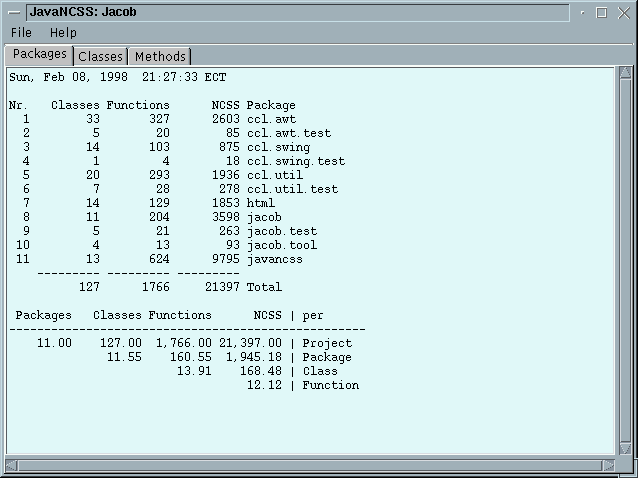
Javancss All...
Javancss Selected...
The difference to 'Javancss All...' is just that the user can count only
part of a project, for example all code of one package or one class. Sometimes
counting a big project can take some time. If a class is selected in the
class window, JavaNCSS counts only the class, if no class but a package
is selected, the whole package gets counted. If you are interested only
in some data of a single method, count the whole class.
Timelog...
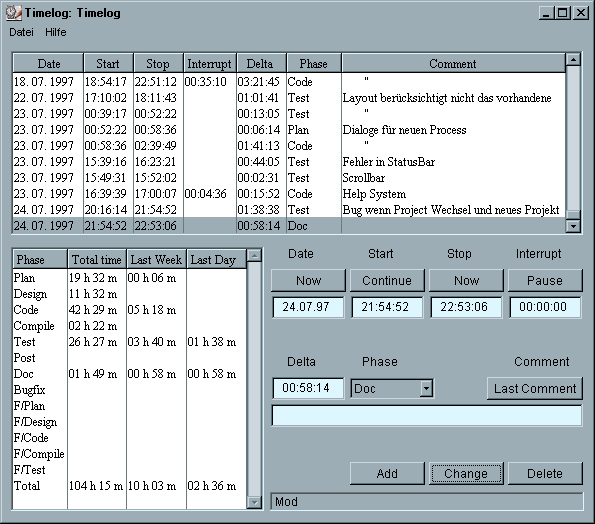 Timelog is a separate program i wrote. As you can see its purpose
is to record your personal development time (or for whatever you spend
your time on which you want to track). You can get additional information
about it on its own
web page. The advantage of starting Timelog out of Jacob is
that Timelog does immediately load the time data for the current
project. Timelog looks in the subdirectory 'psp' for the project's
time data. This directory must exist, otherwise Timelog can't create
a new log file.
To install Timelog for use out of Jacob, download
it and make sure its in Jacob's classpath. Then edit your initialization
file (normally jacob/jacob.ini) and remove the semicolon from
the line ";Timelog...=jacob.tool.TimelogWrapper" in the Tools
section. Also add or insert "|Timelog..." in the line where all
tools are listed.
JavaDump
JavaDump
is the work of Matt T. Yourst.
Thankfully he released it with a very liberal copyright so it can be distributed
together with Jacob. Because Jacob will rely in future versions on JavaDump's
JCF class library for new functionality, JavaDump is also included in Jacob
and you don't need to download and install it separately.
"The JavaDump utility, built with the JCF class file manipulation package,
produces an HTML report from the structures in a class file".
The only thing I changed about JavaDump is, while originally its output
was in HTML format, for Jacob it is in ASCII. That way, the output can
be viewed in Emacs. Loading the output into HtmlViewer would have been
too slow.
JavaP
Since JavaP is part of Sun's JDK you don't need to do anything to get or
install this tool (if you don't use Sun's JDK this might be another case).
Invoking JavaP out of Jacob disassembles the currently selected class,
writes its output in the class name with suffix ".javap" and loads this
file into Emacs. This together with JavaDump is kewl for learning Java
byte code stuff. I am sure somewhere out there exists a disassembler with
output in Jasmin syntax. That might be another candidate for a wrapper
class.
List Archive...
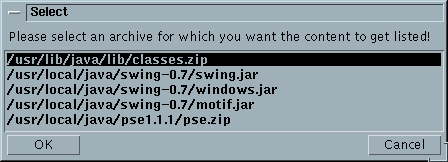 You need to have 'unzip' reachable through your system's path environment
variable. Than you can select an archive that's listed in your current
project's classpath and then the content of the selected jar or zip file
can be viewed from inside Emacs. OK, its not the killer functionality everyone
was looking for, but I once found it convenient to have it and since its
small its not much bloat. BTW, you can remove entries from the Tools menu
manually in the initialization file.
Class Dependencies
Starts with your main class and creates a list with all
classes that get invoked statically. You can use this to
manually check if you
missed distributing a .class file that your project
does need. Does not help in case a class gets dynamically
loaded.
Make sure you have set your project main class in 'Edit->Project Settings...',
invoke this tool, and wait until it has analyzed all class files.
Then it will load a file with all class names into the editor.
Jikes Debugger
This tool lets you invoke IBM's Jikes Debugger with the
appropriate classpath and sourcepath as well as
the relevant main class with your project paramaters.
It is much more convenient then starting
JD from hand each time or writing a batch file for each
project.
Jikes Debugger is the property of IBM and is therefore not
distributed together with Jacob. You can download it for
free from
IBM's alphaworks site.
If you didn't take a look at it yet, it is very much worth
to give it a try. It's not that fast and user friendly (but
it's not so bad either), but it is very stable and didn't
stall even on very big projects. I still try to avoid
a debugger as much as I can, but from time to time it
is very helpful.
To use Jikes Debugger together with Jacob make sure when you
startup Jacob, that he jd.zip archive is in Jacob's classpath.
Be aware of the fact that using JD this way, Jacob and JD
both run in the same virtual machine. If you close and
restart JD several times, memory leaks each time.
I was not able to close down JD and to also garbage collect
all memory Jikes Debugger had used.
If you are concerned with this, use the memory frame
('Help->Memory...') to
keep an eye on Jacob's memory consumption and restart Jacob
if necessary.
Licensor...
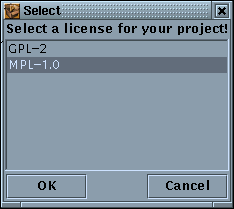
The Licensor is a tool which lets you select a license
and it then goes through all Java source files of your current
project and puts a license header comment at the top.
It gives you a list of the files that were changed (or
unchanged) afterwards.
Right now there are only licenses for the GPL and MPL. If you
regularly work on projects that use a different license, be
it open source or not, you can add easily add more licenses to
Jacob. Put into the $JACOB_HOME/license directory one file
named <license_name>.txt containing the whole text of the
license and a second file named <license_name>-header.txt
containing just the header file which will be used to be put
at the top of each source file.Then in your Jacob initialization
file add <license_name> to the Licenses
key in the [Licenses] section. Next time you restart
Jacob the new license will be known as well.
The header file can have some special tags in it all starting
with a '@' character:
@name
@author
@email
@software
@url
@year
These tags will then be exchanged with their real project
values when the header gets applied to the source code.
E.g. these are the values I have specified for the
Jacob project itself via the
"File->Preferences..." and "Edit->Project Settings..."
dialogs.
@name: Jacob
@author: Chr. Clemens Lee
@email: clemens@kclee.com
@software: Jacob - The Java Commando Base
@url: http://www.kclee.com/clemens/jacob/
@year: 2001
Back to Jacob's main page
Chr.
Clemens Lee, email to: clemens@hehe.com


